Word Not Allowing to Save or Upload
By default, if y'all're logged in to your Office apps with your Microsoft business relationship, your apps save your documents in OneDrive storage. This encourages y'all to store your files on the cloud so that you can access those files on other synced devices.
Nonetheless, in that location are times when you may like to save the office files to your computer instead. Luckily, Function apps allow you to switch the default save location from OneDrive to your computer. In this guide, we'll show you lot how to set Office 365 to salve files locally.

Save Microsoft Part Files to Local Computer By Default
The process to change the default save location is the same for all Role apps, including Give-and-take, Excel, and PowerPoint. Also, if you make 1 Function app relieve files to your local reckoner, all other apps automatically beginning saving files locally on your auto also.
Hither'south how you make that change in Word (which will auto-apply to all other Function apps):
- Launch Microsoft Give-and-take on your estimator.
- Select Options from the left sidebar. If you're on Word's editing screen, select File > More than > Options instead.
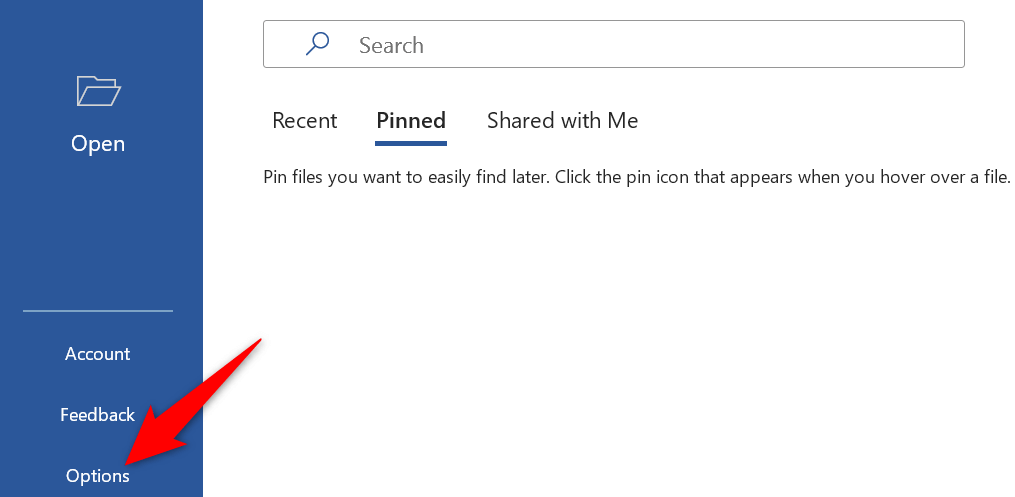
- Select Save in the sidebar on the left of the Discussion Options window.
- Enable the Save to Figurer by default choice in the Salve documents section on the right.
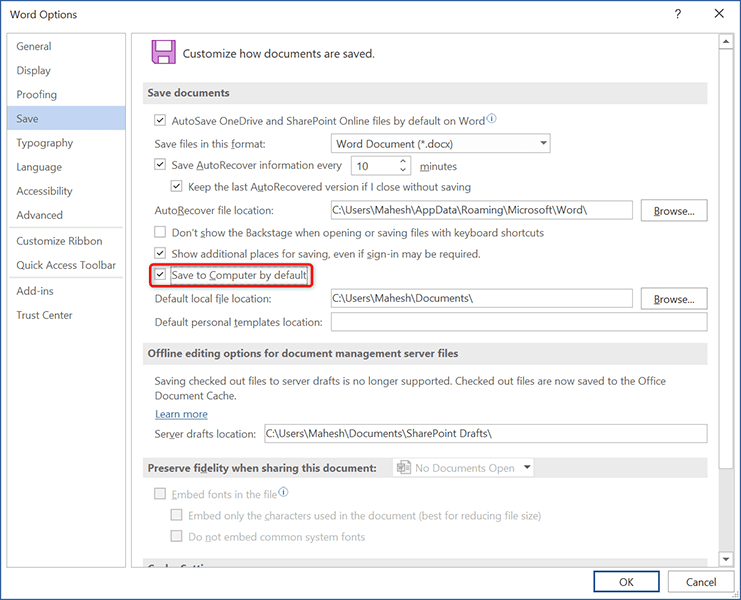
- Save your changes by selecting OK at the bottom of the window.
Your Part apps will now salvage files to your computer instead of OneDrive.
To make the apps salve files to OneDrive again, deselect the Salvage to Computer by default option on the Give-and-take Options window.
Change the Default Salve Location in Microsoft Office
Once yous choose your computer equally the default relieve location for your Part documents, you lot'll want to modify the default folder where the files are saved. This way, you ensure your documents are saved exactly in the folder yous desire.
Unlike the higher up method, you'll take to specify the default save folder for each Function app manually.
- Open the Office app where you desire to change the default local save binder. We'll open up Word.
- Select Options from the sidebar on the left.
- Choose Salvage from the left sidebar on the Word Options window.
- Select Browse side by side to Default local file location on the right pane.
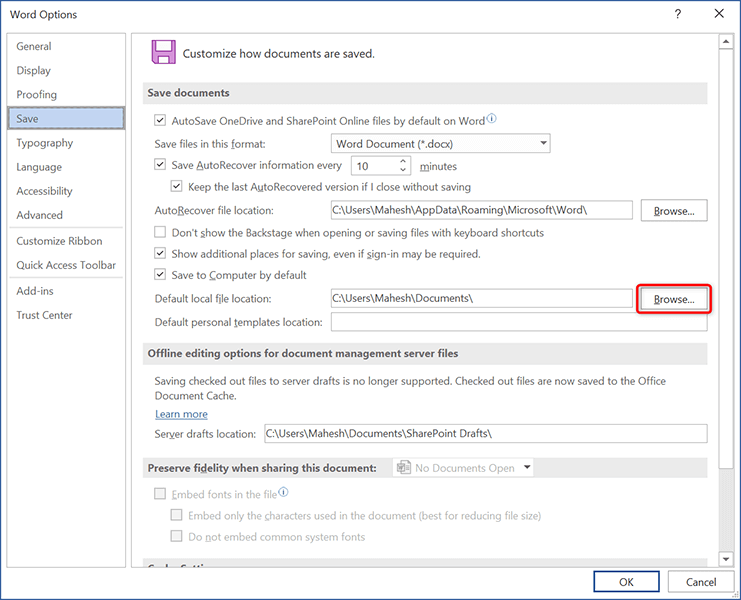
- Navigate to the folder that you lot want to brand the default salvage folder and select that folder.
- Choose OK at the bottom of the Give-and-take Options window to save your settings.
From now on, your Office app will save your documents in your specified folder by default. Y'all can modify the default folder equally many times as y'all want.
Only Save Individual Office 365 Documents to Local Computer
If yous only want to save sure documents to your local computer while the rest go to the cloud, Office apps accept an option to do that. This way, you can cull the save location for individual documents in your apps.
To do so in Word:
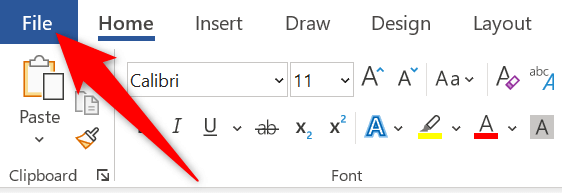
- Open up your certificate with Microsoft Word on your estimator.
- Select the File tab at the top.
- Choose Save Equally from the sidebar on the left.
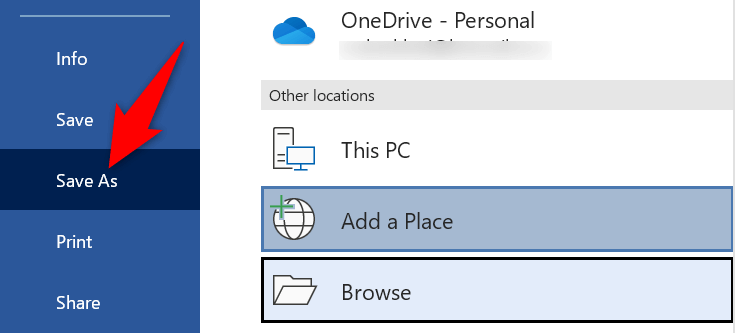
- Select Browse from the Other locations section on the right.
- You lot can now choose a local folder on your calculator to shop your certificate in.
Suppose y'all save certain documents locally on your computer too ofttimes, simply not frequently enough to brand your computer the default save location. In that instance, you can pin the Salvage Equally push to your Quick Admission Toolbar to quickly relieve individual documents on your local storage.
That way, you lot only accept to click a single button in the Quick Access Toolbar to salve a file on your machine. Here's how to pin Save As to the toolbar in Word:
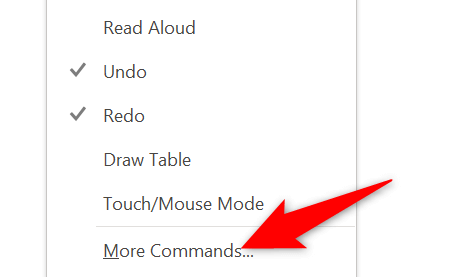
- Select the downward-pointer icon at the top of the Word interface and cull More than Commands.
- Select Save As from the options list on the left. And then, select Add together.
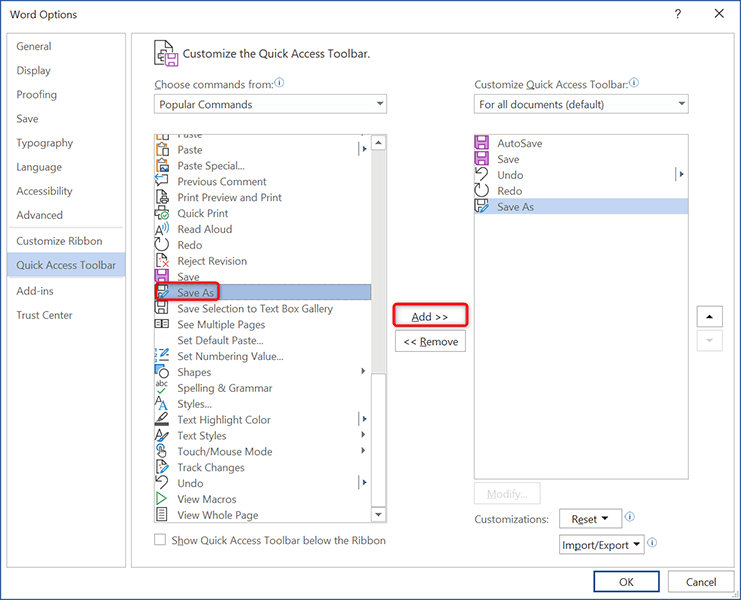
- Save your changes by choosing OK at the bottom of the window.
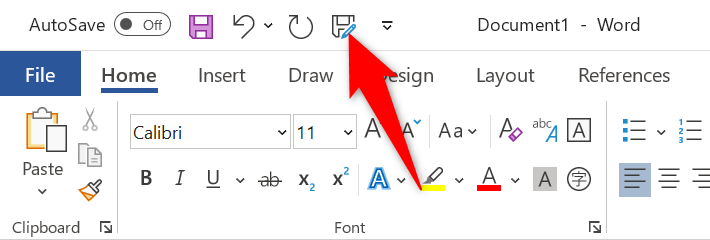
- The Salvage As option is now pinned to your Quick Access Toolbar. Select this option each time you want to save a document locally.
Use the Traditional "Save As" Window to Save Role Documents Locally
Newer versions of Microsoft Part evidence a modern "Save As" window. If you're missing the traditional File Explorer-like "Save Every bit" window, and you'd similar it dorsum in your Function apps, you can do so with an pick.
- Launch an Office app on your calculator. We'll use Word.
- Select Options from the sidebar on the left.
- Cull Relieve from the sidebar on the left of the Discussion Options window.
- Enable the Don't prove the Backstage when opening or saving files with keyboard shortcuts option.
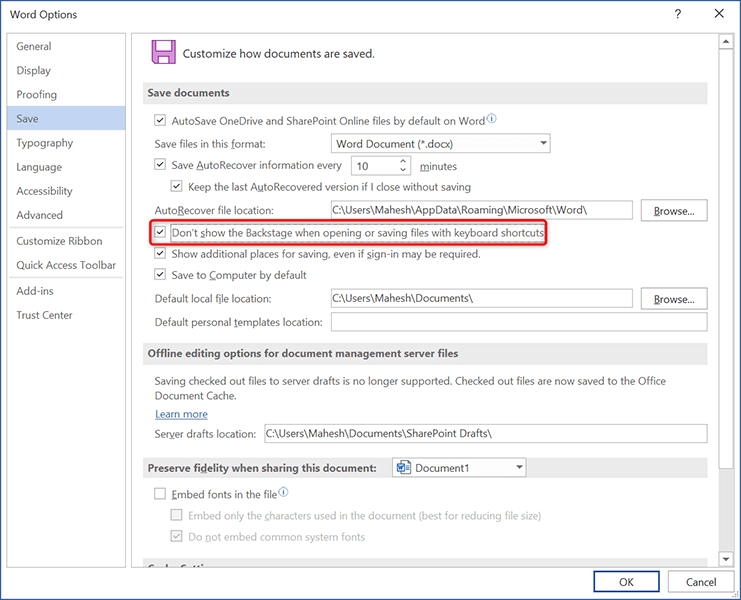
- Select OK at the bottom of the window to save your changes.
Try saving a document, and you'll now see the traditional "Relieve As" window allowing you to choose a binder to save your file in.
Get Office 365 To Save Files Locally on Your Computer
Microsoft's motility to brand OneDrive the default storage for Office documents is not bad, but not everyone may want to use it. If you'd rather save your documents locally on your machine, there's an option to practice that in each Office app, as shown higher up.
We hope this guide helps you continue your "offline" documents offline.
Do not share my Personal Information.
Source: https://www.online-tech-tips.com/ms-office-tips/how-to-save-office-documents-to-local-computer-by-default/
0 Response to "Word Not Allowing to Save or Upload"
Post a Comment